How to Create a Schedule in SOFRIQ Publish
SOFRIQ Publish lets you prepare several image posts and publish them automatically to selected social accounts. A schedule contains publishing dates, a frequency, posting times, destinations, images, and optional post content.
Before creating a schedule, you must have at least one supported social channel connected and at least one eligible account and destination selected.
Connect Social Channels Before Creating a Schedule
SOFRIQ Publish supports Pinterest, Facebook, and Instagram. Your account must already be connected to the channel before it can be selected in the schedule creator.
Follow the How to Connect Social Channels guide before continuing. You will also need to complete platform-specific account and destination selection during the connection process.
Open the Create Schedule Page
- Sign in to your SOFRIQ dashboard.
- Open the Apps page from the sidebar.
- Select Publish.
- Select Create New Schedule.
The Create Schedule page is divided into three steps:
- Select Channels & Accounts
- Configure Schedule
- Content & Publish
You can select the numbered workflow steps to return to a completed step. SOFRIQ checks that step's required information before allowing you to continue forward.
Prerequisites for Creating a Schedule
Before activating a schedule, make sure that you have:
- Signed in to SOFRIQ.
- Connected at least one social channel.
- Selected one eligible account for every selected channel.
- Selected at least one destination for every selected channel.
- Enough remaining Publish credits.
- Available images in Media Library or images ready to upload.
- A future start date and a valid date range.
- At least one generated post slot.
If no connected account is available, SOFRIQ shows the warning:
Connect at least one social account to create a schedule.
Return to the Channels page, connect a supported channel, and add an account and destination before creating the schedule.
Step 1: Select Channels and Accounts
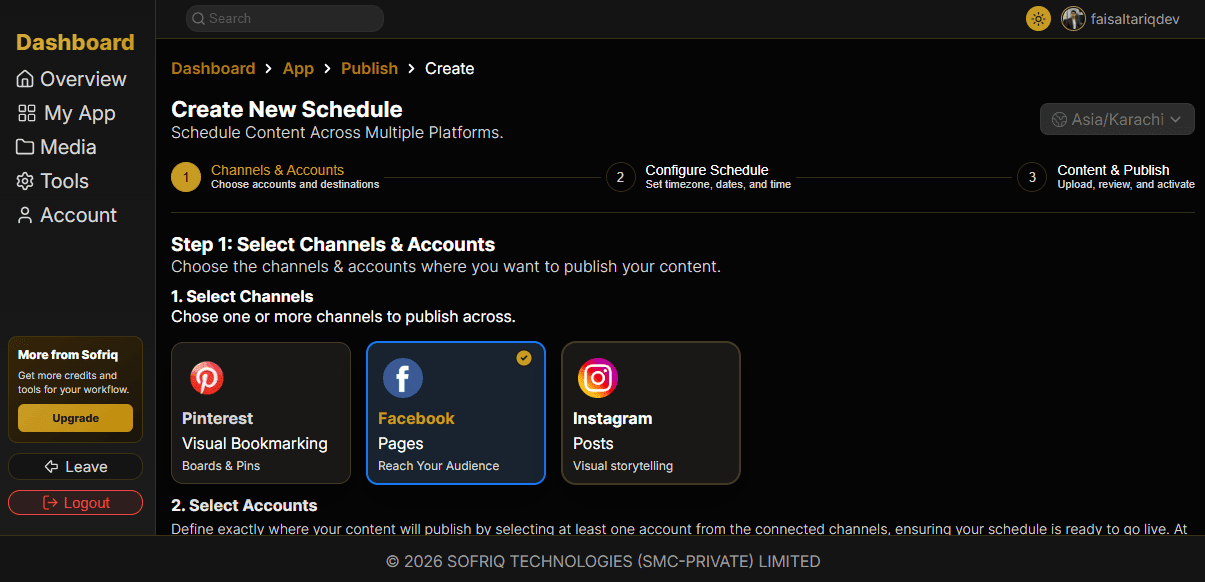
Select a Channel
Select one or more channel cards:
A check indicator and a changed background color of the card show that the channel has been selected.
SOFRIQ may display this warning when the selected channel has no connected account:
Connect a Pinterest account before selecting this channel.
The warning names the relevant channel, and the channel card is not used until a valid account can be selected.
Select an Account
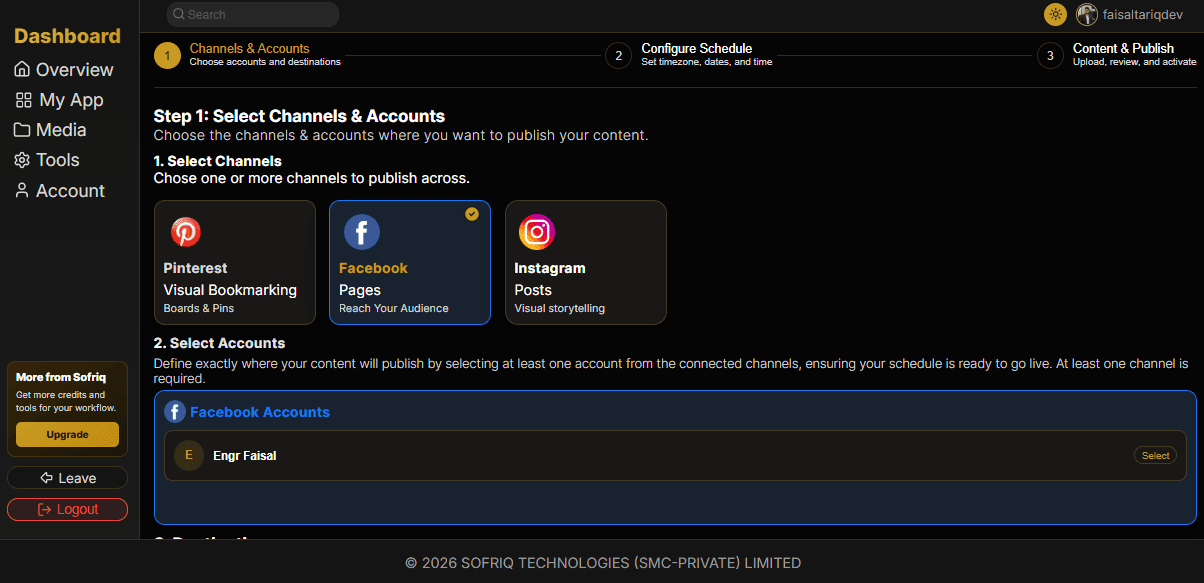
After selecting a channel, its connected accounts become available under Select Accounts.
Select one or more accounts that you want to use with that channel. Confirm that the profile name, username, and account image belong to the account you intended to select.
For Pinterest, the account is the authorized Pinterest profile. For Facebook, the account is the authorized Facebook account associated with one or more Pages. For Instagram, select the eligible Instagram professional account provided by the linked Facebook authorization.
Select Publishing Destinations
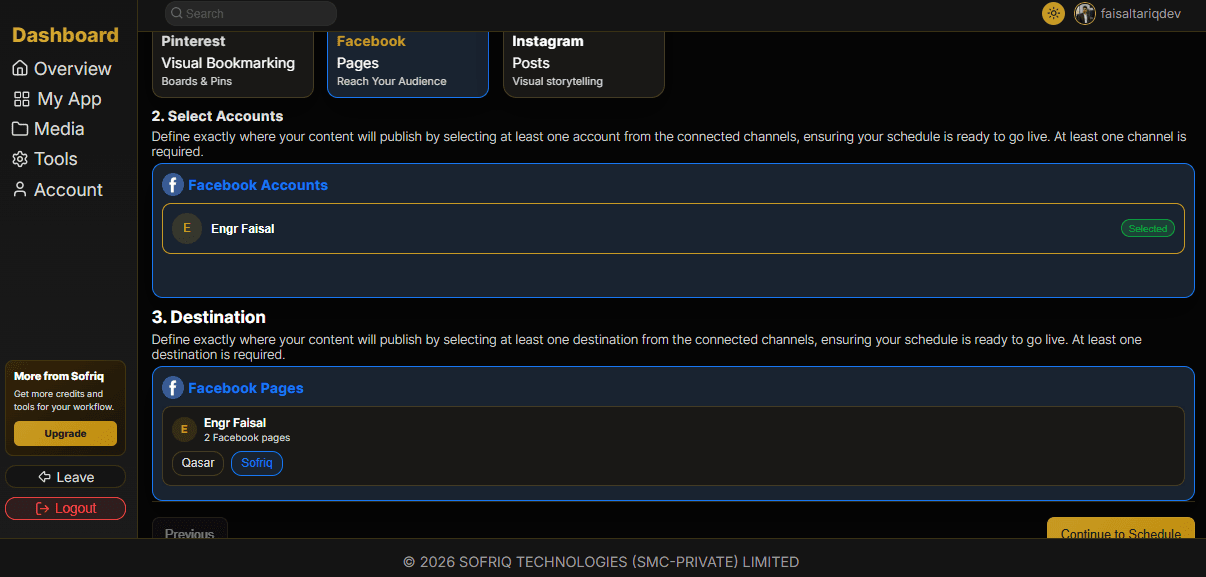
After selecting accounts, continue to the Destination section. The available destinations depend on the selected channel and account.
- Pinterest: Select one or more Pinterest Boards.
- Facebook: Select one or more Facebook Pages.
- Instagram: The selected eligible Instagram professional account is the publishing destination.
Each selected channel must include at least one destination. Selecting more than one destination publishes the schedule content to every eligible destination selected for that account.
You cannot continue without a connected account and destination. SOFRIQ displays:
Select a channel, connected account, and destination before continuing.
If account or destination limits prevent a connection from appearing, review the plan limits and reconnect or add an eligible destination.
Continue to Schedule Configuration
At the bottom right corner, select Continue to Schedule after choosing the required channel, account, and destination combinations.
If a previous step is incomplete, the wizard stays on the current step and displays a warning instead of advancing.
Step 2: Configure Schedule
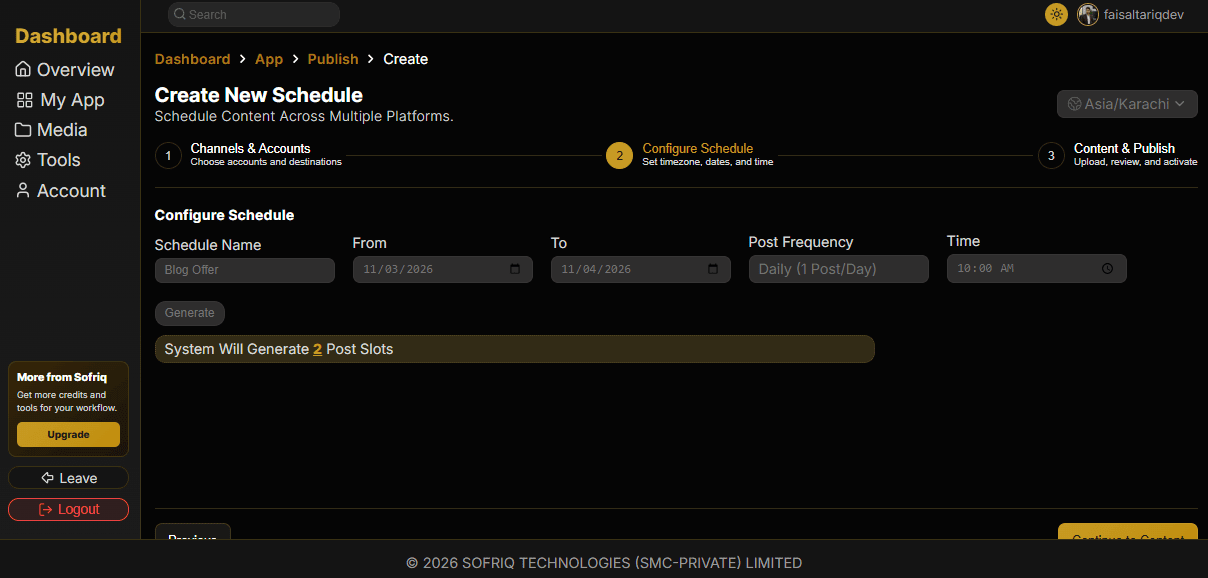
Enter a Schedule Name
Enter a unique and recognizable schedule name, such as:
- August Product Launch
- Weekly Blog Promotion
- Halloween Campaign
SOFRIQ uses this name in the Publish schedule list. Duplicate schedule names are not allowed.
Select a Timezone
Select the timezone in which you want the schedule dates and post times to be managed. SOFRIQ converts the selected local schedule time to UTC before storing it.
Select a timezone that matches the audience or publishing location instead of your device timezone if they are different. Timezone is automatically assigned based on your location. You can change it by changing the timezone from the top right corner.
Set the Start and End Date
Select the From date as the first possible date for the schedule. Select the To date as the final possible date.
The start date and end date must:
- Use a valid calendar date.
- Be today or in the future.
- Place the end date on or after the start date.
Past Date Warnings
If the selected start or end date is before today's date, SOFRIQ clears the invalid field and displays one of these warnings:
- From Date is Old
- To Date is Old
Select a new future date before continuing.
Invalid Date Range Warning
If the end date is earlier than the start date, SOFRIQ clears the affected field and displays:
Invalid Date Range
Choose a start date before the end date. If the conflict is in the From field, clear or update the selected end date as needed and select both dates again.
Select Post Frequency
Choose the required frequency before generating post slots:
| Frequency | Post Date Behavior |
|---|---|
| Daily | Creates one post for every day in the selected date range. |
| Every 2nd Day | Creates posts every second calendar day, starting with the From date. |
| Every 3rd Day | Creates posts every third calendar day, starting with the From date. |
| Business Days | Creates posts Monday through Friday and skips Saturday and Sunday. |
| Weekends Only | Creates posts on Saturday and Sunday and skips weekdays. |
Every 2nd Day and Every 3rd Day include dates calculated from the From date. For example, if the From date is Monday, Every 2nd Day creates posts on Monday, Wednesday, Friday, and so on.
Select a Post Time
Select the time when posts should publish.
The same selected time is initially assigned to every generated post slot unless you change individual post times later in the schedule preview.
Make sure the schedule time uses the timezone selected in the previous field. A timezone mismatch can cause SOFRIQ to publish later or earlier than expected if the local time is interpreted differently.
Generate Post Slots
Select Generate after entering the schedule name, timezone, date range, frequency, and time.
SOFRIQ calculates the required number of posts, displays the value under System Will Generate, and creates one schedule slot for each eligible date.
For example, a daily schedule from 1 August to 7 August creates seven post slots. A Business Days schedule within the same week normally creates five slots.
Fill All Required Fields Warning
If the Generate button is selected with incomplete information, SOFRIQ displays:
Fill All Required Fields
Complete the schedule name, timezone, From date, To date, frequency, and time first.
No Post Slot Warning
Some date and frequency combinations produce no posts. If no eligible date exists, SOFRIQ displays:
At Least One Post Slot is Required based on your schedule settings.
For example, Weekends Only may produce no result if the selected date range contains no Saturday or Sunday.
Publish Credits
Every generated post slot uses 2 Publish credits.
Required credits are calculated as:
Number of generated post slots × 2 credits
For example:
- 10 post slots require 20 credits.
- 15 post slots require 30 credits.
- 30 post slots require 60 credits.
SOFRIQ checks the remaining account credits before generating the schedule.
Not Enough Credits
If the schedule needs more credits than the account currently has available, SOFRIQ displays Upgrade Your Plan and shows the upgrade information panel.
The schedule date and other generated-slot fields are cleared so the user cannot continue with an unaffordable configuration. Upgrade the plan or reduce the date range or number of scheduled posts.
At activation time, SOFRIQ can also return:
Not enough credits. Scheduling each post uses 2 credits.
If this message appears, stop activating, review the account credit balance, and try again after upgrading or using fewer post slots.
Plan Restrictions and Watermarks
A Free plan schedule applies the SOFRIQ watermark to every published post. Basic, Creator, and Pro plan schedules are saved without the SOFRIQ watermark.
| Plan | Publish Watermark |
|---|---|
| Free | Applied to published posts |
| Basic | Not applied |
| Creator | Not applied |
| Pro | Not applied |
Watermark status is determined by the plan at the time the schedule is saved. Publishing a Free-plan schedule also means that all generated posts carry the SOFRIQ watermark according to the current Publish watermark configuration.

This watermark will be applied on the bottom right corner of the post image. It will use 28% width and 15% height of the total image. Also, a watermark in the post description will be added!
This post is automatically published by Sofriq Publish. Scan the QR code to automate your posts across multiple channels at once.
Step 3: Content and Publish
Continue to Content & Publish after the schedule slots have been successfully generated.
You must add exactly one image for every generated post slot.
Add Images
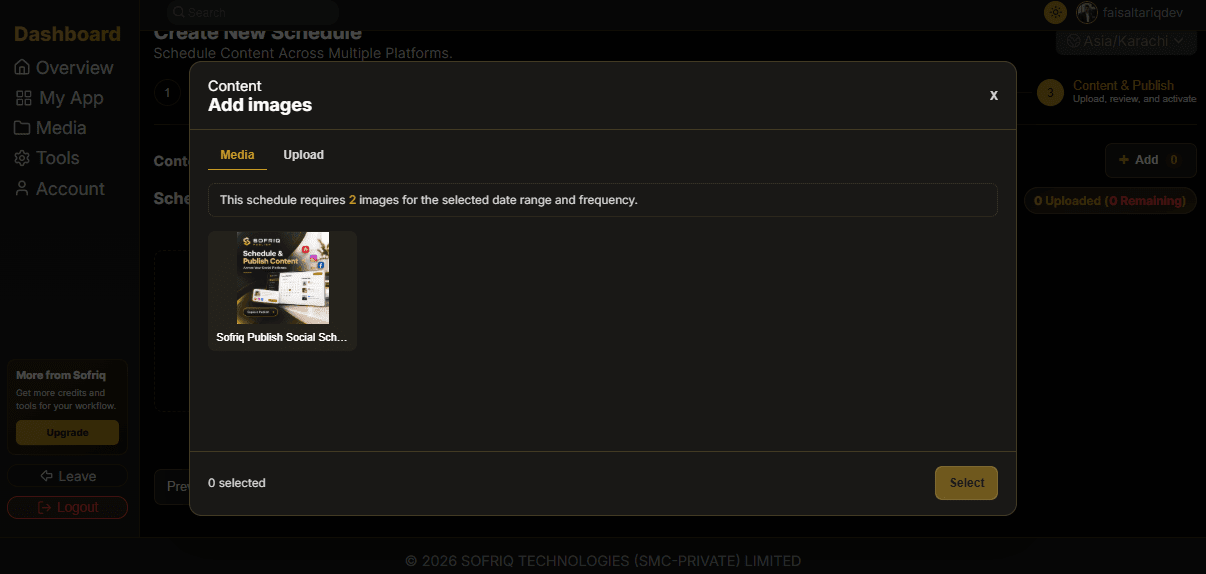
Select Add and choose Media or Upload.
The Media tab displays the active images available in your Media Library. Select one or more images and use Select to add them to the schedule. You can add a partial quantity when the required image count has not yet been completed.
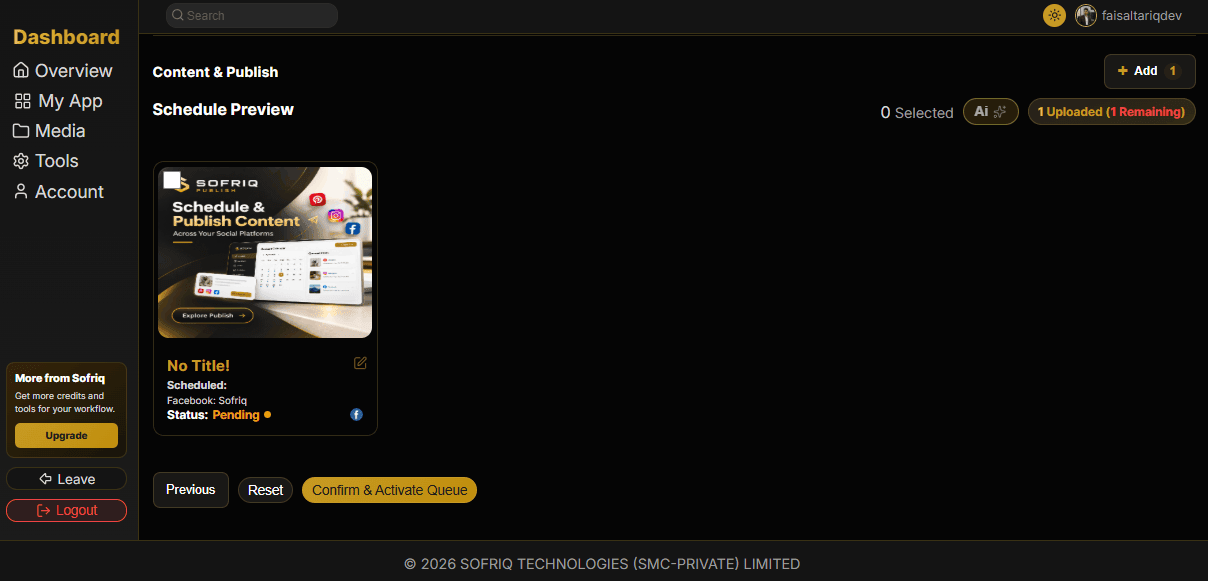
For example, if the schedule requires two images and your Media Library contains only one image, select that image and use Select. It will be added to the schedule as the first post image. Select the Add button again, open the Upload tab, and upload the remaining image to complete the schedule.
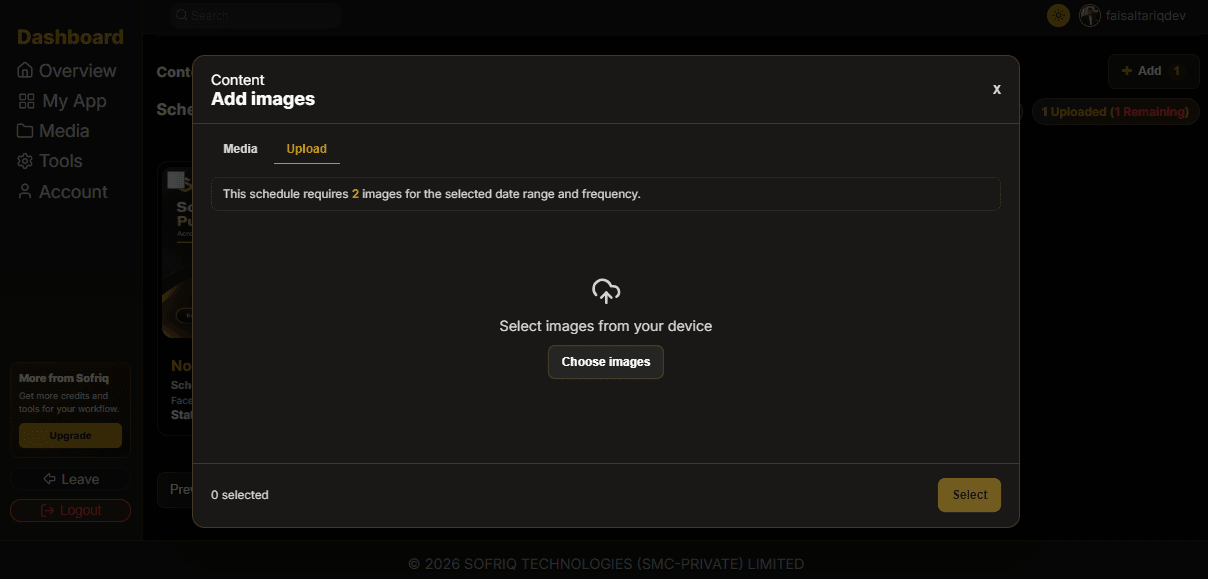
The Upload tab lets you select images from your device. Images uploaded here are counted toward the remaining required slots, not the total required image count. For example, if one image has already been added and the schedule requires two images, the remaining upload quantity is one image.
If you select more files than the remaining slots allow, SOFRIQ shows:
Select no more than X image(s).
In this message, replace X with the number of images still required by the schedule. On the Upload tab, choose image files from your device using Choose images. Uploads start automatically, and a separate Select action is not required.
Each generated post must have exactly one image. You cannot complete the schedule with fewer images than the generated post count, and uploading more images than the remaining slots allow is not permitted. During final activation, SOFRIQ may show:
- Upload Min X posts Based on Date Range — fewer images than required have been added.
- Upload Max X posts Based on Date Range — more images than required have been added.
In both messages, X is the total number of posts generated from the selected date range and frequency.
Upload Images Exactly Once per Post
Every post requires exactly one active image. Upload or select the same number of images as generated post slots. SOFRIQ displays the uploaded count and the remaining image count while preparing the schedule.
If activation is attempted with incomplete images, SOFRIQ shows:
X images required
or:
All required images must be uploaded.
If there are more uploaded images than required, SOFRIQ shows:
Only X images are allowed for the selected frequency.
If more than one upload fails, every failed image card must be removed and re-added or uploaded successfully before activation.
Edit Individual Schedule Posts
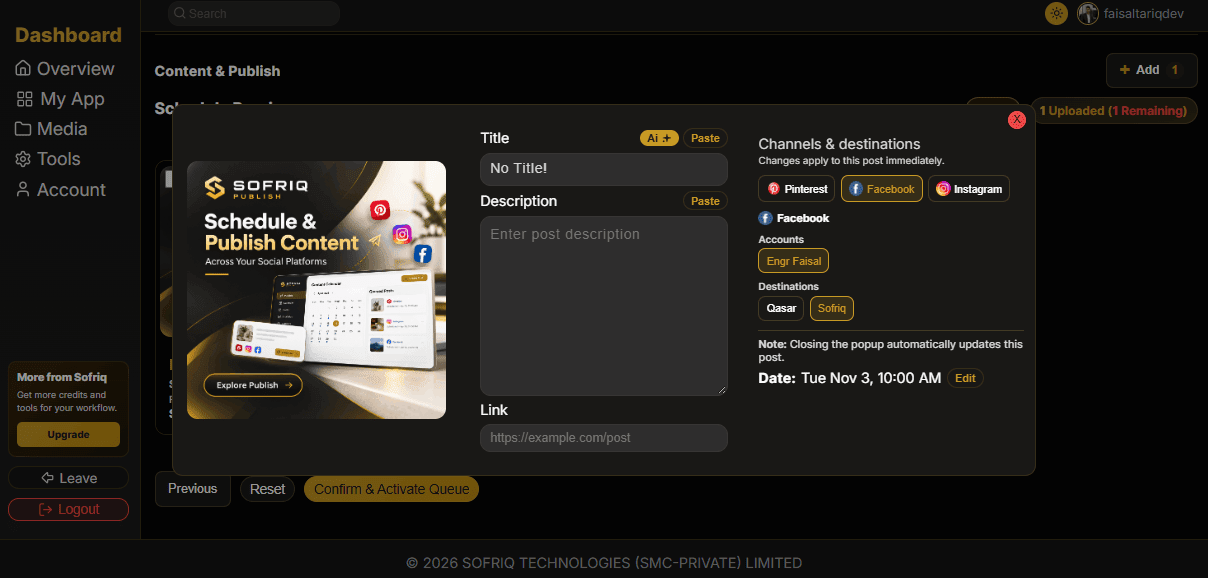
After uploading images, each post card has an edit button. On the edit button click, an editPost dialog appears with current post details.
The dialog contains fields:
- Image
- Post Title
- Post Description
- Post Link
- Post Channels & Destinations
- Schedule date and time
Post Title
Enter an optional title for the post. Remember that title works only on Pinterest; on Facebook and Instagram, it is fully ignored. The title can contain up to 100 characters. Keep titles concise and useful for the destination audience.
Post Description
The description can contain up to 2150 characters. Platform limits may be lower than SOFRIQ's limit, so review each selected network's publishing requirements. Pinterest descriptions are limited to 800 characters.
If Pinterest is selected and your plan is Free, the description must be 669 characters or fewer. This space is reserved because SOFRIQ adds its caption watermark to the published post.
Post Link
Enter an optional external link of up to 500 characters. Link is for Pinterest only. Link will be ignored for Facebook & Instagram.
Change an Individual Post Time
Each generated post can use the schedule’s timezone and assigned date and time. You can change the individual post date and time when its schedule card supports editing.
The new time must be valid and must match the selected frequency and configured date range.
SOFRIQ displays the following warnings for invalid post times:
- Please Select Valid Schedule Date
- Schedule Date/Time Cannot Be Old
- Schedule Date/Time Must Be Within Selected Date Range
- Schedule Date/Time Does Not Match Selected Frequency
- Schedule Date/Time Is Already Used By Another Post
These messages mean:
- The entered date/time is incomplete or invalid.
- The date/time has already passed.
- The date/time is outside the selected From and To range.
- The date does not follow Daily, Every 2nd Day, Every 3rd Day, Business Days, or Weekends Only.
- Another post in the same schedule is already assigned to that exact date and time.
Generate Content with AI
SOFRIQ can generate post content for selected posts using AI.
- Select one or more posts.
- Enter a generation prompt if requested.
- Select the AI button.
Review AI-generated titles and descriptions before activation. AI output may need editing for accuracy, brand voice, destination requirements, and factual correctness.
If no post is selected, SOFRIQ displays:
Select Post to Generate Content
If the AI prompt is empty, SOFRIQ displays:
Add a prompt so the AI knows what to generate.
A selected image and postcard still require manual review even when AI content has been generated successfully.
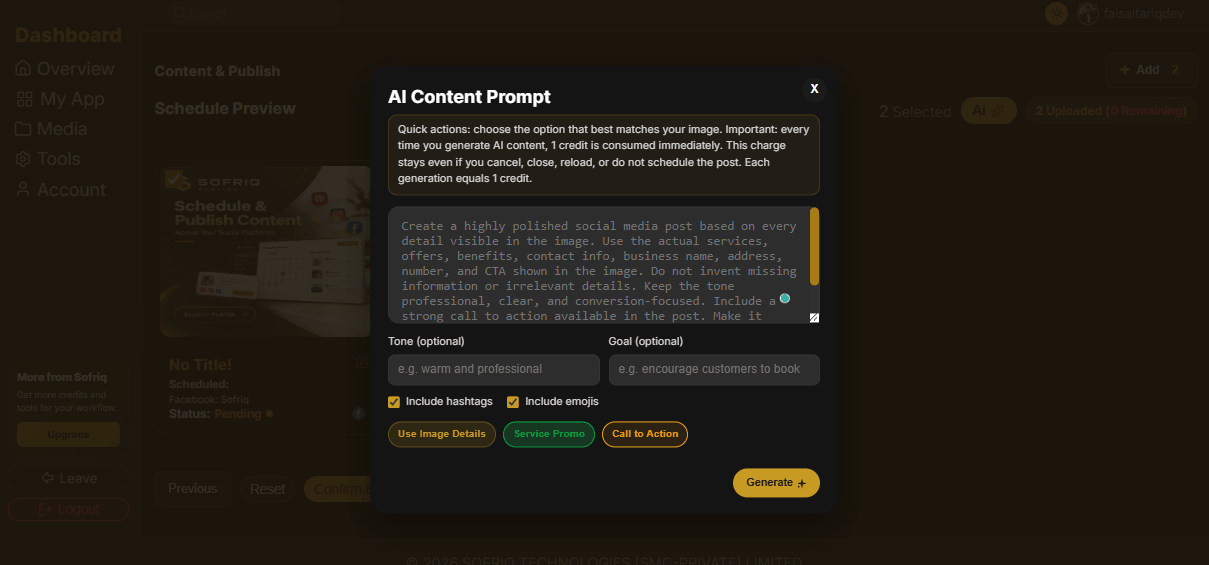
1 post needs 1 credit for AI generation. These Credits are different from the 2 credits required to publish a post.
Review Before Activation
Before activating the queue, review:
- Generated post count.
- Required image count and uploaded count.
- Selected channels, accounts, and destinations.
- Schedule timezone.
- Start and end dates.
- Frequency and individual posting times.
- Post titles and descriptions.
- Optional links.
- Available Publish credit balance.
If the schedule information is incomplete, SOFRIQ displays:
Complete the schedule, account, and destination fields first.
If required images are missing when trying to continue, SOFRIQ displays:
Upload every image required for this schedule before reviewing it.
Activate the Queue
Select Confirm & Activate Queue when all required information and images are ready.
During activation:
- The activation button becomes disabled.
- The button displays an animation and the text Sending Data...
- The page prevents accidental reloads while submission is in progress.
Activation Success
If the schedule is saved successfully, SOFRIQ displays:
Posts scheduled successfully!
The button shows the successful server message briefly before the browser redirects to the Publish dashboard.
Success on the Publish Dashboard
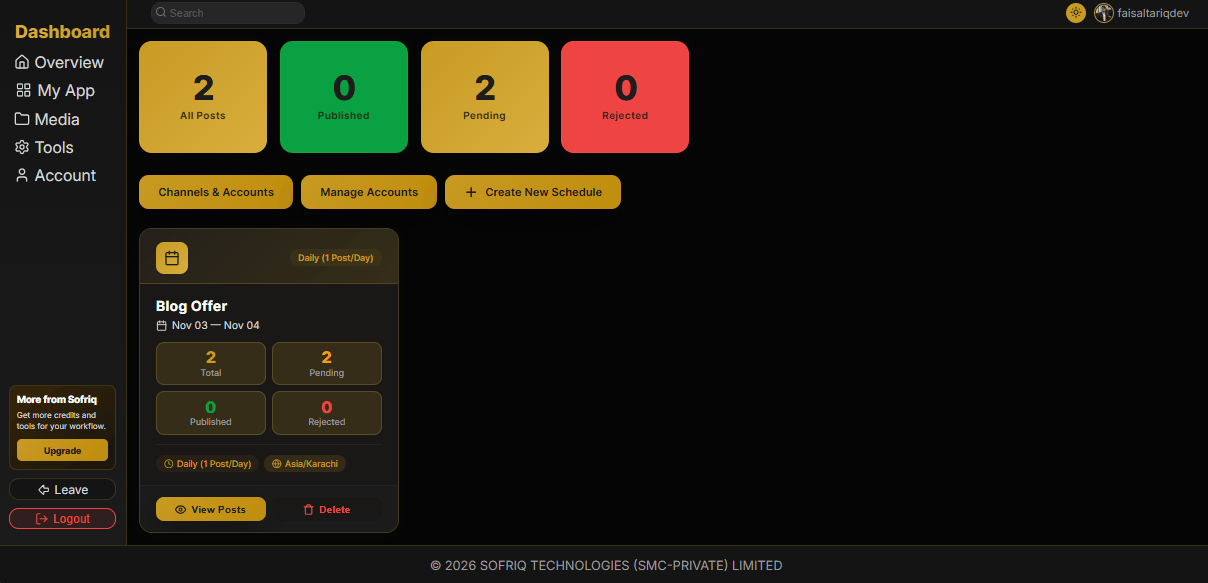
After successful activation, the new schedule appears on the Publish page with:
- The schedule name.
- Total post count.
- Pending post count.
- Published post count.
- Rejected post count.
- Date range.
- Timezone.
- Frequency.
- Selected destination summary.
Every new post is initially marked as Pending. Select View Posts to review the posts, publication dates, channels, destinations, statuses, and available actions.
Schedule Activation Errors
Schedule Name, Timezone, or Posts Missing
Provide a schedule name, valid timezone, and at least one post.
This error means required schedule metadata or generated posts were missing when the server received the request. Return to the wizard and complete all required fields.
Invalid Schedule Date Range
Provide a valid schedule date range.
The server rejected the date range format or found that the end date is before the start date.
Duplicate Schedule Name
Schedule with this name already exists!
Select another schedule name. Schedule names must be unique for the current SOFRIQ account.
Invalid Post Timezone
One post has an invalid timezone.
Return to the schedule configuration and select a valid timezone supported by SOFRIQ.
Missing Post Data
Each post needs a valid time, uploaded image, selected account, and destination.
One or more posts are incomplete. Review the schedule date, image, selected channel account, and destination before submitting again.
Unable to Save Schedule
If the server has no specific error message, SOFRIQ displays:
Unable to save this schedule.
The activation button is restored so the user can review the schedule and try again.
Network Error
If the browser cannot reach SOFRIQ, SOFRIQ displays:
Network error while saving the schedule.
Check the internet connection, do not close the page, and activate the schedule again after the connection returns.
Images from Media Library or Device Uploads
Images added from Media Library should already be active public image records belonging to the current account.
Images uploaded from a device are added in the media library automatically. In the Free plan, applying a watermark doesn’t affect the actual image saved in the library.
Images uploaded from a device are added to the same schedule workflow, and upload progress is shown in the postcard.
If an image upload fails, SOFRIQ displays the failed upload status on the affected post card. Remove the failed image and upload it again, or select another image from Media Library or Upload.
Reset the Schedule
Select Reset to clear the schedule creation workflow and start again.
Before resetting, save or copy any required post text because reset removes the unsaved schedule configuration and generated post preview.
Related Articles
- How to Edit Pending Posts
- How To Edit Published Posts
- How To Delete Pending Posts
- How To Delete Published Posts